For the last year or so I have been doing kite repairs. I don't generally advertise this fact, as I don't want to be chained to the sewing machine 12 hours a day. I have no intention of running a sweat shop, with me as the child labour. But even just with the local trade I have got through a fair few kites, and I have had to face the fact it's actually quite a good way to earn some money. The other slightly sad fact is that I got quite into it, and started developing my own methods.
I owe it all, as with a few things in my current existence, to my friend Jimmy who has done kite repairs for about 4 or 5 years, covering warranty work for some of the brands and shops down his way in Kent. He was nice enough to come down and show me a few hints and tips (in return for some cider)
So in the name of freedom of information, and also because I get asked questions on how you do this repair, or that repair all the time, I am going to do a quick how-to explaining a few simple repairs.
I am not giving away all the secrets, as this will be a breach of the magic repair circle, and I will have Paul Daniels on my arse faster than you can say 'bobbins'.
Using/setting up the machine is a skill in itself which takes a while to learn and perfect and I wouldn't suggest you start trying to learn on your own, or even worse other peoples kites. You will end up punching many unnecessary holes in a innocent kite. But anyhoo, here is a few photos of how I carried out a recent grisly LE repair. You also need a decent industrial sewing machine, preferably with a long arm, and/or a lot of clearance which will cost more than sending it to a proper sail maker or kite repair guy.
 |
| Kaput |
So here we are, whoopsy diddle, a foot long hole in the leading edge, most likely caused by self launching on something sharp judging by other deep scrapes on the leading edge material close by. To make things interesting (or not), it has torn along to that hang point on the right as the air came out and it fell to the ground with the pressure on it. The bladder is pretty knackered, with a foot long rip right along the seam. If you really wanted to (or are unable to source a new replacement bladder) you could fix it with Stormsure and some spare PU from a donor bladder.
 |
| T shaped effort |
So once it is laid flat, it all becomes a little more clear how to sort it out. Not as bad is it initially looked. Notice I have unpicked the leading edge here already to get the segment nice and flat before laying it up. Ideally stretch it over the edge of your table, and weight it with something.
 |
| Double sided tape applied - accuracy is key at this stage |
So the next stage is laying up the repair with double sided tape. From a point of view of getting the kite to fly the same afterwards, and not to hang to one side, this is by far the most important part to be accurate. This is specially important when it comes to canopy repairs. If you are a few millimetres off it can make all the difference. It's fiddly, and depending on the area damaged it can be time consuming. Imagine it like sticking a jigsaw puzzle back together. Also, with ripped Dacron there is usually a furry edge to the material which makes matching it back up accurately difficult. Most Dacron has lines running longways on it, spaced an even 12mm apart, so get your ruler out and make sure it all lines up.
 |
| Looking better already, with new Dacron graft on the left |
So as you can see above, I have removed the backing from the double sided tape applied to the torn LE. I have measured out and applied more tape to the edges of the replacement Dacron that I will graft over the top of the repair. The theory is to transfer the load onto this, and off the damaged material underneath. Again, when you measure and cut this, you need to be very accurate, or you will waste material, or make an ugly looking repair. You need to overlap the tear by at least 1cm. If you need to, you can apply a patch to the inside of the LE, in this case I made a small one 12 x 10cm under the bump stop, as the tear had stretched underneath here, and the exterior patch wouldn't have covered it fully.
 |
| Laid up, ready for sewing |
So next stage is applying the patch. The aim is to get it perfectly flat. Approach this like applying a sticker, starting at one end and working it flat to the other. If it's not on right, peel it off and start again.
 |
| Bitchin' stitchin. |
Next step is to run around the patching with the machine. A 3 step zig zag is the standard. The thread is Dabond V69, which is extremely tough and UV resistant. I try and keep about 1mm off the edge of the patch to prevent it from peeling back. Top tip: make sure you check underneath material you are stitching for anything that shouldn't be there. i.e the other half of the leading edge, a wandering bridle, or even worse, the LE bladder. Otherwise you could be at home to 'Bobby McBallsup'
 |
| It's great when you're straight |
So now we need to close the edge back up. A liberal application of double sided tape to the closing seam is required, and you an match it all back where it was before you unpicked it. You can also match up the kinks in the LE material to help you do this. Again, accuracy at this stage is absolutely key. It needs to be lined up exactly as it was previously, or you will see bulges in the LE.
 |
| Tapeitupnow. |
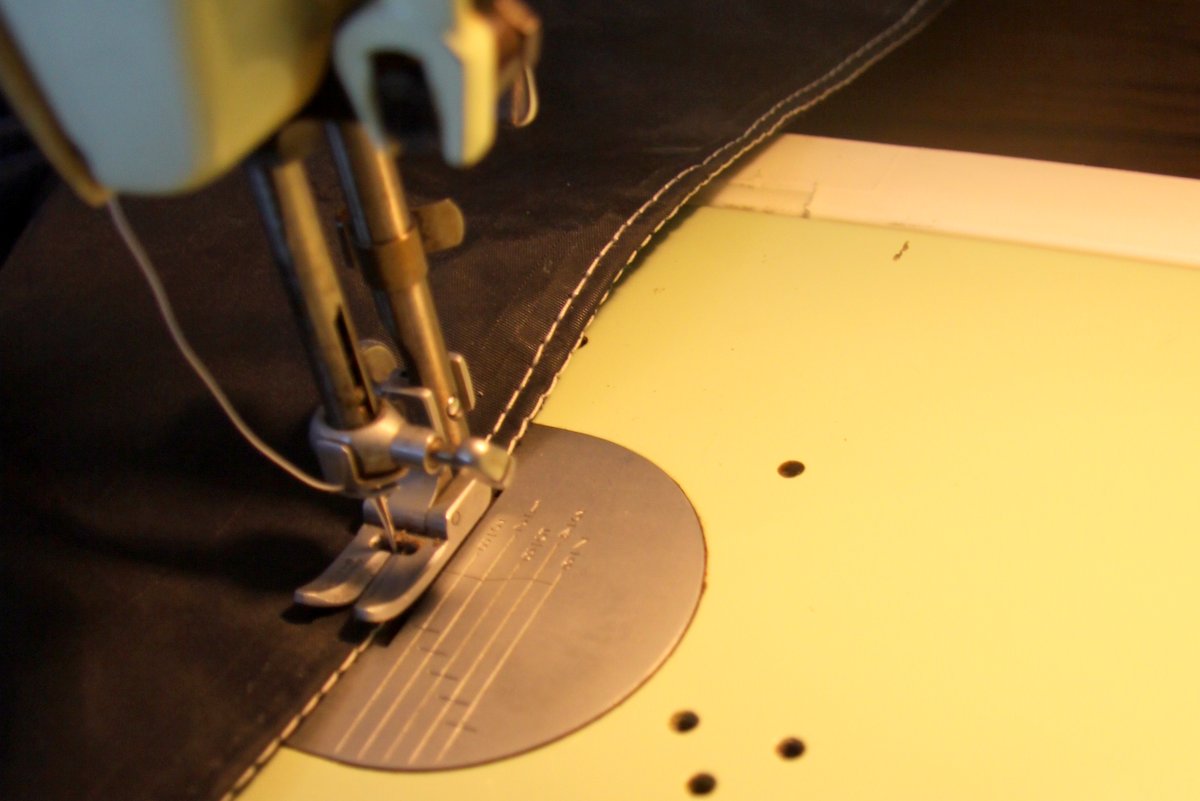
Next is closing the LE seam. This varies from kite to kite, as some have extra webbing over the seam. In this case it's a simple sew a straight stitch down the middle. Thread tension needs to be just right at this stage to get a nice strong stitch.
 |
| First closing seam |
Once this is done, fold it over applying more double sided tape to line it up properly. Once folded, a second run of straight stitch finishes it off. Bang tidy.
 |
| Final closing seam |
At this stage I try and match the new stitching though the old holes as much as possible. If you make new holes you end up with a weak 'edge of a postage stamp' effect along the edge of the Dacron, meaning it s more likely to let go under impact. Kites which have more overlapping material on this seam are often weak here anyway as there are twice as many holes.
I neglected to take any more photos of this kite as the client needed it back in a hurry, but it is now cruising the South Hams on light wind days as if nothing ever happened.